【Selenium】Selenium4 Grid
Selenium Grid: 将客户端发送的命令转发到远程浏览器上执行 WebDriver 脚本。
简介
Selenium Grid 是由一个 hub 服务和若干个 node 代理节点组成。
Hub 调度服务,管理各个代理节点的注册信息和状态信息,并且接收来自客户端代码的调用请求,把请求的命令转发给代理节点执行。
Node 代理节点,相当于一台可以运行浏览器自动化测试的机器,根据 hub 的命令执行脚本。
- 支持在多台机器上并行测试
- 支持在不同的浏览器版本上进行测试
- 支持跨平台测试
执行流程
- 运行代码初始化
driver时,配置远程浏览器为hub服务 + 端口; - 服务端收到代码请求后转为执行命令,分发给不同的
node(浏览器); node根据收到的命令执行测试;- 测试完成后返回结果给
hub; hub收集结果返回给客户端。
搭建
整套环境搭建可以通过两种方式:
*.jar(太麻烦且不易维护)docker(官方镜像支持,即插即用)
Docker 简单好用,由于要启动多个服务,这里使用工具 docker-compose 进行部署。
1. 编写配置文件
新建目录下创建配置文件 compose.yml,用来定义初始化容器的配置。
# ref: https://github.com/SeleniumHQ/docker-selenium
version: "3"
services:
  chrome:
    image: selenium/node-chrome:4.6.0-20221104
    shm_size: 2gb  # 设置共享内存,官方建议值,避免浏览器引起容器崩溃
    depends_on:    # 设置依赖关系
      - selenium-hub
    environment:
      - SE_EVENT_BUS_HOST=selenium-hub
      - SE_EVENT_BUS_PUBLISH_PORT=4442
      - SE_EVENT_BUS_SUBSCRIBE_PORT=4443

  firefox:
    image: selenium/node-firefox:4.6.0-20221104
    shm_size: 2gb
    depends_on:
      - selenium-hub
    environment:
      - SE_EVENT_BUS_HOST=selenium-hub
      - SE_EVENT_BUS_PUBLISH_PORT=4442
      - SE_EVENT_BUS_SUBSCRIBE_PORT=4443

  selenium-hub:
    image: selenium/hub:4.6.0-20221104
    container_name: selenium-hub
    ports:
      - "4442:4442"
      - "4443:4443"
      - "4444:4444"
2. 启动服务
# 进入配置文件所在的目录下
# 该目录下尽量别放其他东西,影响启动性能
$ cd seleniumgrid

# -d 后台启动
$ docker-compose up -d
Creating network "seleniumgrid-compose_default" with the default driver
Creating selenium-hub ... done
Creating seleniumgrid-compose_firefox_1  ... done
Creating seleniumgrid-compose_chrome_1 ... done
根据日志可以看到,首先创建桥接网络,每个容器都会自动加入该网络中,便于服务间互相通信;然后再启动 Hub 容器,根据依赖关系,继续启动节点容器。
同一服务配置,支持启动多个容器节点。注意:如果要启动多节点的话,配置文件内不要定义容器端口号,避免冲突。
# 启动多节点
$ docker-compose up -d --scale chrome=2 --scale firefox=2
Creating selenium-hub ... done
Creating seleniumgrid-compose_firefox_1 ... done
Creating seleniumgrid-compose_firefox_2 ... done
Creating seleniumgrid-compose_chrome_1  ... done
Creating seleniumgrid-compose_chrome_2  ... done

# 停止并删除容器&网络
# stop 指令仅停止不删除
$ docker-compose down
3. 验证
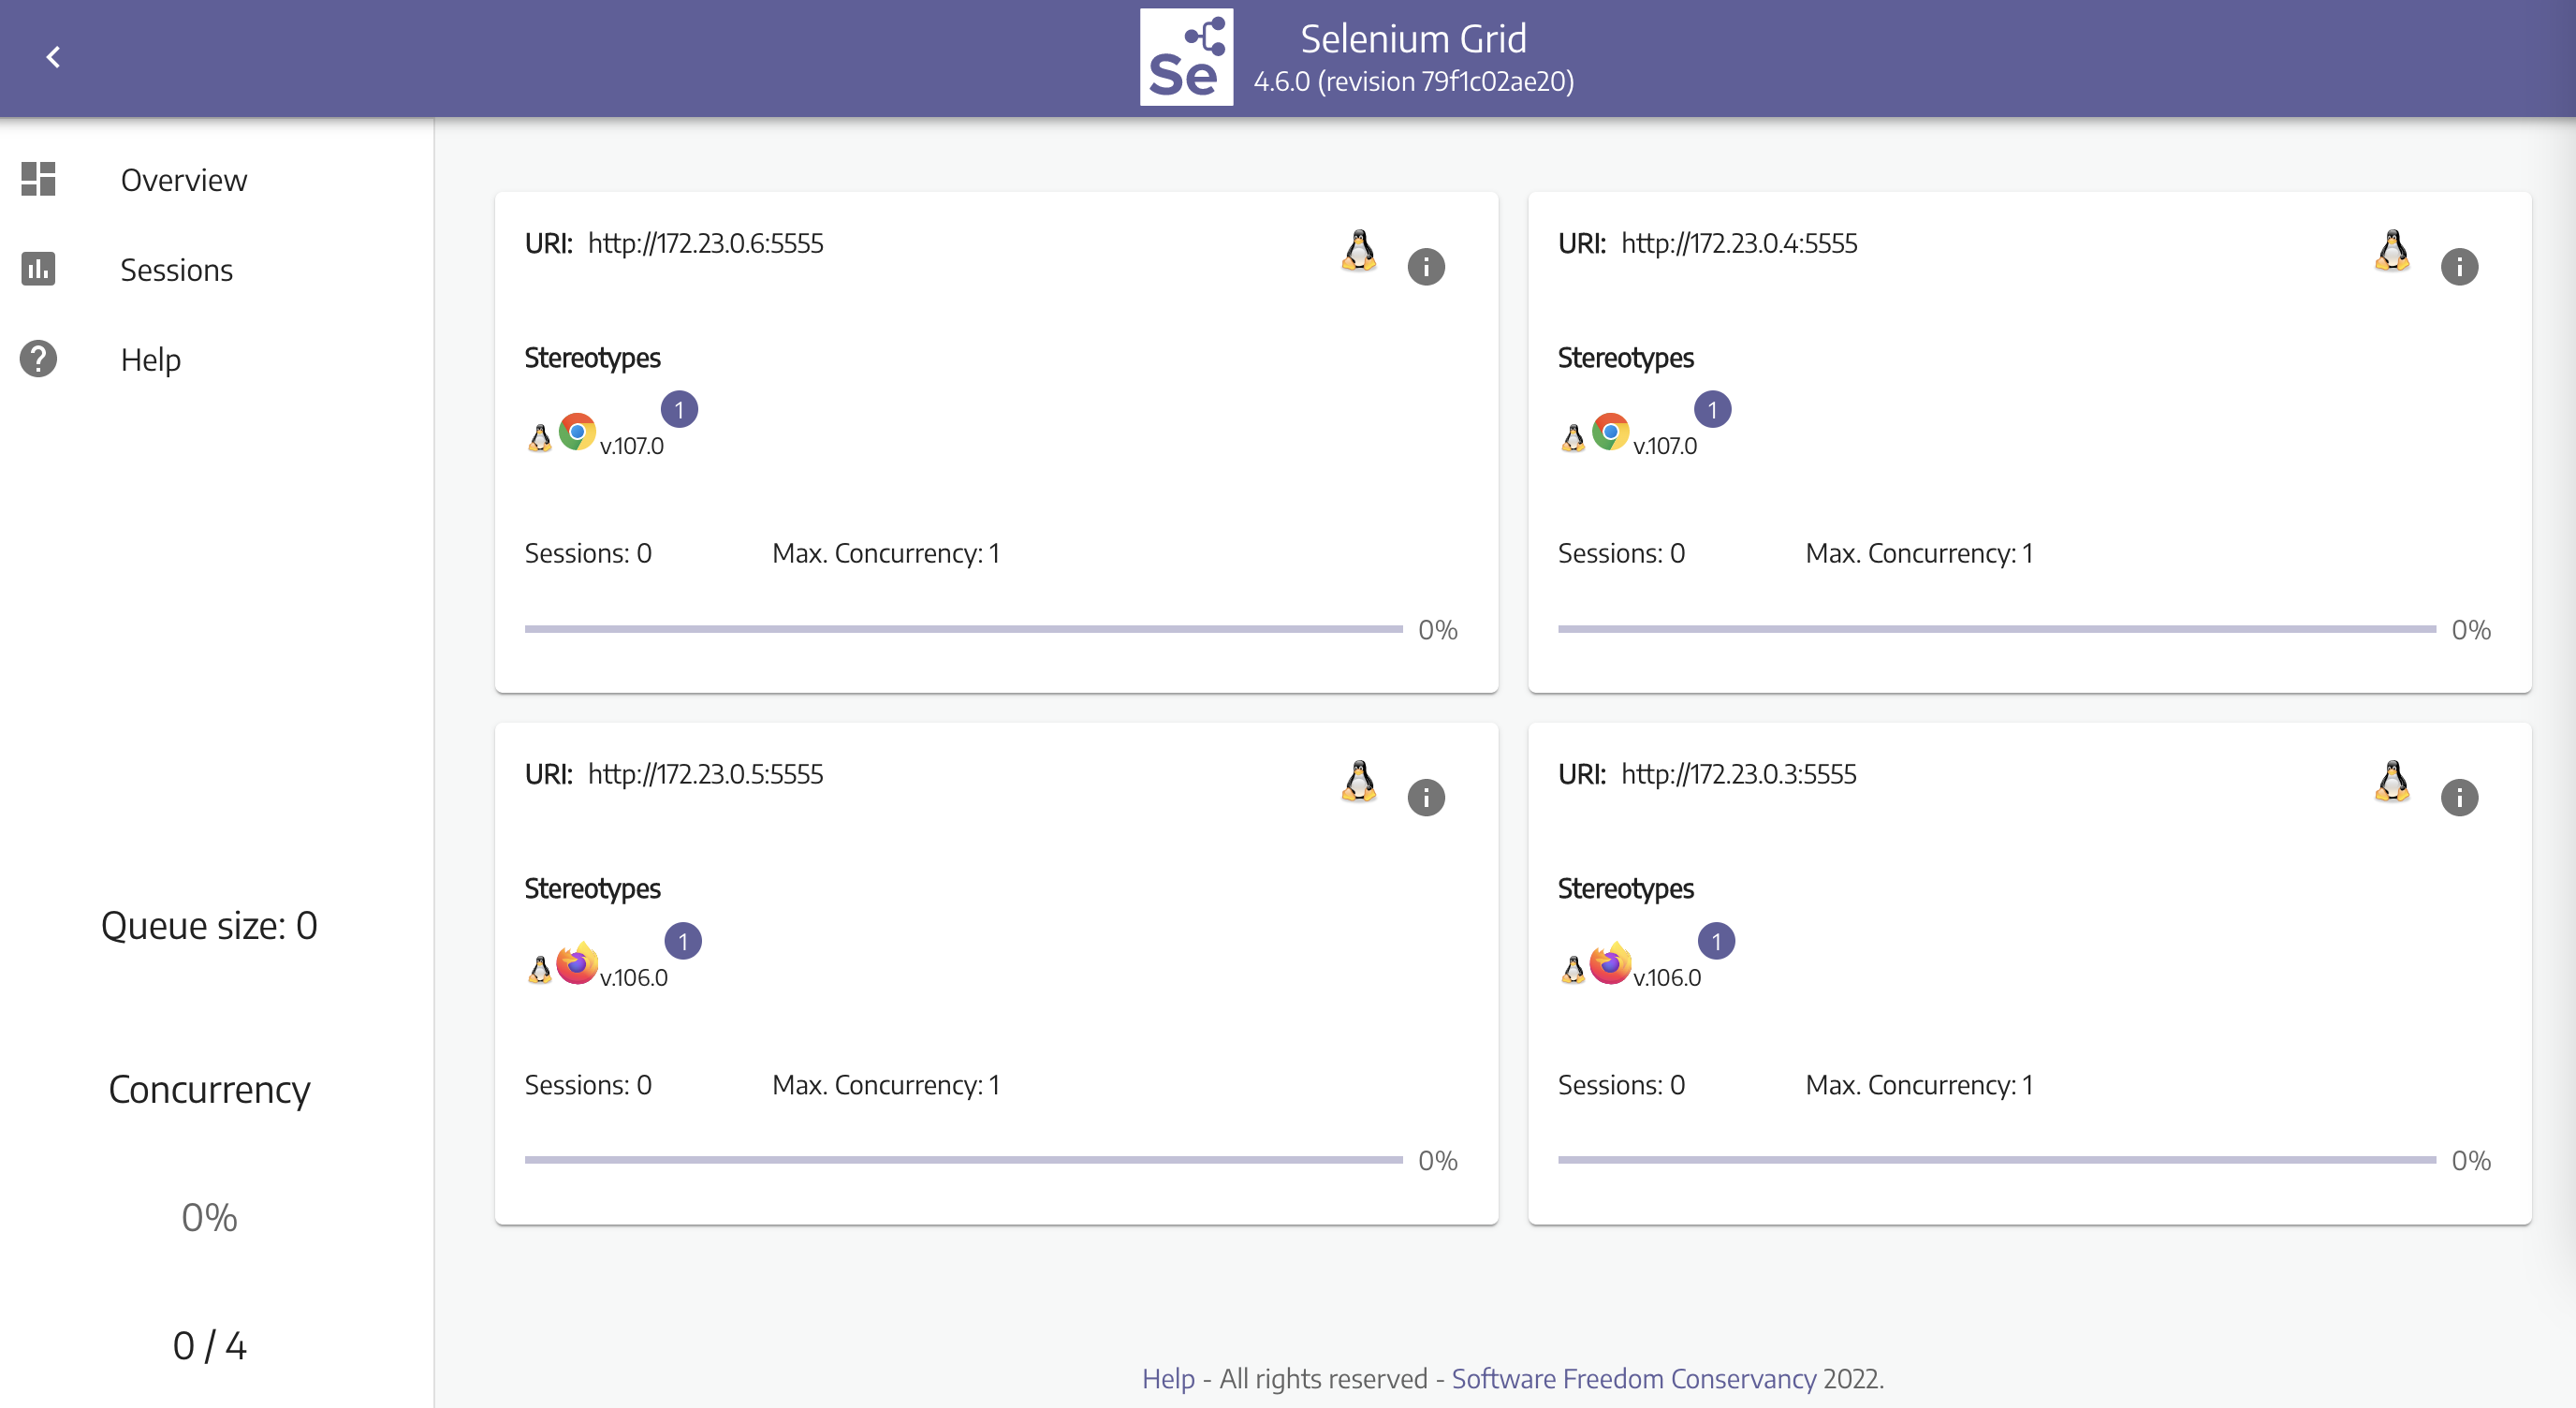
访问服务端: http://localhost:4444,可以看到启动的节点信息,即为成功。
运行
编写测试脚本,在远程节点上运行。
import pytest
from time import sleep
from selenium import webdriver

"""
初始化 chrome | firefox driver
"""
@pytest.fixture(scope='session')
def driver():
    options = webdriver.ChromeOptions()
    driver = webdriver.Remote(
        command_executor='http://localhost:4444/wd/hub',
        options=options
    )
    yield driver
    driver.quit()

@pytest.fixture(scope='session')
def firefox_driver():
    firefox_options = webdriver.FirefoxOptions()
    driver = webdriver.Remote(
        command_executor='http://localhost:4444/wd/hub',
        options=firefox_options
    )
    yield driver
    driver.quit()

"""
测试执行:2 条用谷歌浏览器,2 条用火狐浏览器
测试用例:访问百度首页,在页面停止一秒。
"""
URL = "https://baidu.com"
TITLE = "百度一下,你就知道"

def test_chrome(driver):
    driver.get(URL)
    sleep(1)
    assert driver.title == TITLE

def test_chrome2(driver):
    driver.get(URL)
    sleep(1)
    assert driver.title == TITLE

def test_firefox(firefox_driver):
    firefox_driver.get(URL)
    sleep(1)
    assert firefox_driver.title == TITLE

def test_firefox2(firefox_driver):
    firefox_driver.get(URL)
    sleep(1)
    assert firefox_driver.title == TITLE
用例运行完成后,观察 hub 界面展示,会看到节点运行状态与 session 信息。 由于是单线程运行,所以会有两个闲置节点。
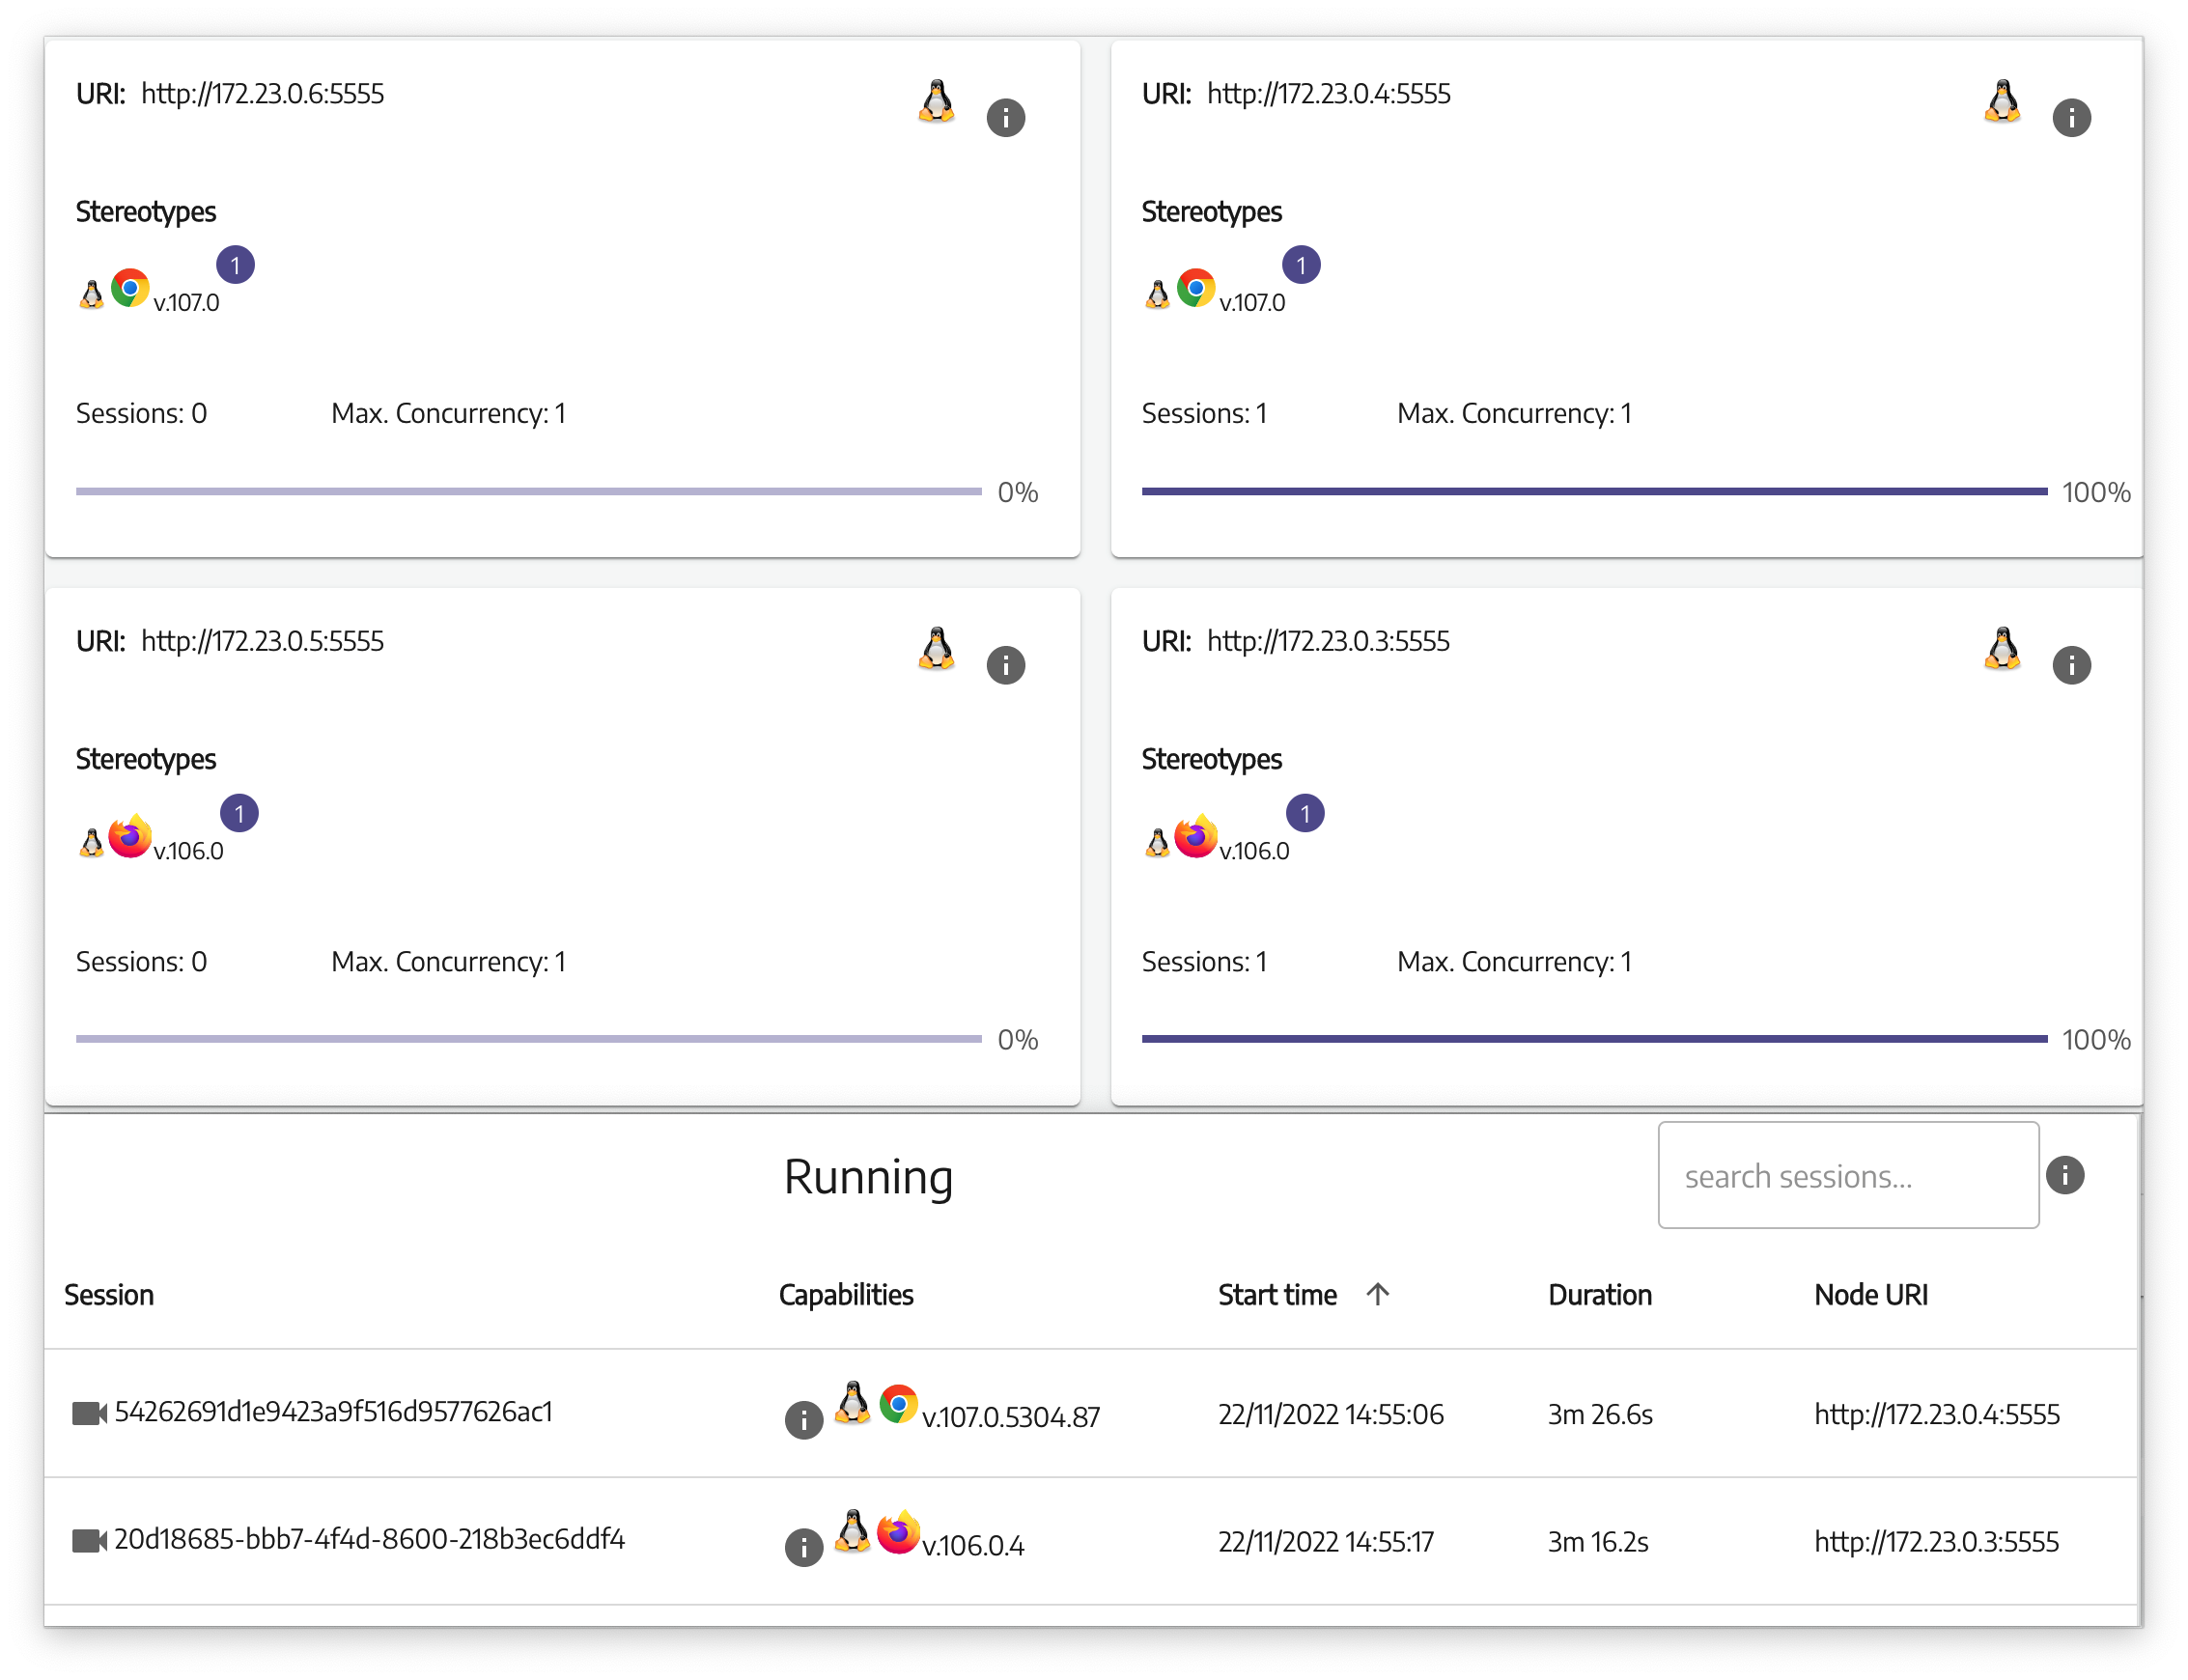
单线程运行测试用例
hello.py::test_chrome
hello.py::test_chrome2
hello.py::test_firefox
hello.py::test_firefox2
===== 4 passed in 143.25s =====
并发执行测试用例
# 两节点并发
$ pytest hello.py -n 2 -vs
...
[gw1] PASSED hello.py::test_chrome2
[gw0] PASSED hello.py::test_chrome
[gw1] PASSED hello.py::test_firefox2
[gw0] PASSED hello.py::test_firefox
===== 4 passed in 42.20s =====

# 四节点并发
$ pytest hello.py -n 4 -vs
...
[gw1] PASSED hello.py::test_chrome2
[gw0] PASSED hello.py::test_chrome
[gw3] PASSED hello.py::test_firefox2
[gw2] PASSED hello.py::test_firefox
===== 4 passed in 27.21s =====
根据运行时间,可以看到,并发测试会明显缩短耗时。实际项目中,需注意规避用例间的依赖问题。
Debugging
浏览器运行在容器内,本地看不到用例执行过程。为方便调试,代理节点允许用户查看容器内浏览器的执行过程。
实现此功能需要将浏览器端口暴露出来,注意主机端口号不要重复,可以按序增加。
比如:
Chrome : port=7900Firefox: port=7901
在 compose.yml 内增加端口号,修改后重新启动服务。
# VNC Viewer
version: "2"
services:
  chrome:
    image: selenium/node-chrome:4.6.0-20221104
    shm_size: 2gb  # 设置共享内存,官方建议值,避免浏览器引起容器崩溃
    depends_on:  # 设置依赖关系
      - selenium-hub
    environment:
      - SE_EVENT_BUS_HOST=selenium-hub
      - SE_EVENT_BUS_PUBLISH_PORT=4442
      - SE_EVENT_BUS_SUBSCRIBE_PORT=4443
      - SE_VNC_NO_PASSWORD=1  # 取消 VNC 密码,默认密码 secret
    ports:
      - "5900:5900"  # VNC Server
      - "7900:7900"  # noVNC Web

  firefox:
    image: selenium/node-firefox:4.6.0-20221104
    shm_size: 2gb
    depends_on:
      - selenium-hub
    environment:
      - SE_EVENT_BUS_HOST=selenium-hub
      - SE_EVENT_BUS_PUBLISH_PORT=4442
      - SE_EVENT_BUS_SUBSCRIBE_PORT=4443
    ports:
      - "5901:5900"
      - "7901:7900"

  selenium-hub:
    image: selenium/hub:4.6.0-20221104
    container_name: selenium-hub
    ports:
      - "4442:4442"
      - "4443:4443"
      - "4444:4444"
方式一:VNC Viewer Client
该项目使用 x11vnc 作为 VNC 服务器,通过 VNC Viewer 客户端建立连接后,可实时查看容器内运行情况。
- 新建连接
Command+N - VNC Server:
IP/Host:Port - Name: 自定义
如果未添加无需密码的配置项,则需要输入默认密码 secret 后建立连接。
方式二:noVNC Web
基于 noVNC 可以直接在本机浏览器上查看容器内的运行情况,无需安装客户端。
访问配置的端口服务即可:
- Chrome: http://localhost:7900
- Firefox: http://localhost:7901