spring cloud alibaba (三) Nacos客户端开发和openfeign服务间通信
大佬地址:SpringCloudAlibaba(三)——Nacos客户端开发和openfeign服务间通信 - 转身刹那的潇洒 - 博客园 (cnblogs.com)
首先创建一个生产者模块:记得这个要是子模块啊,他要用到之前的那两个包。
创建的子模块的pom.xml如下
<?xml version="1.0" encoding="UTF-8"?>
<project xmlns="http://maven.apache.org/POM/4.0.0" xmlns:xsi="http://www.w3.org/2001/XMLSchema-instance"
xsi:schemaLocation="http://maven.apache.org/POM/4.0.0 https://maven.apache.org/xsd/maven-4.0.0.xsd">
<modelVersion>4.0.0</modelVersion>
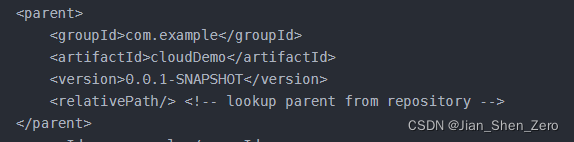
<parent>
<groupId>com.example</groupId>
<artifactId>cloudDemo</artifactId>
<version>0.0.1-SNAPSHOT</version>
<relativePath/> <!-- lookup parent from repository -->
</parent>
<groupId>com.example</groupId>
<artifactId>springcloudAlibaba-products-9090</artifactId>
<version>0.0.1-SNAPSHOT</version>
<name>springcloudAlibaba-products-9090</name>
<description>springcloudAlibaba-products-9090</description>
<properties>
<java.version>11</java.version>
</properties>
<dependencies>
<dependency>
<groupId>org.springframework.boot</groupId>
<artifactId>spring-boot-starter-web</artifactId>
</dependency>
<dependency>
<groupId>org.springframework.boot</groupId>
<artifactId>spring-boot-starter-test</artifactId>
<scope>test</scope>
</dependency>
<dependency>
<groupId>com.alibaba.cloud</groupId>
<artifactId>spring-cloud-starter-alibaba-nacos-discovery</artifactId>
</dependency>
</dependencies>
<build>
<plugins>
<plugin>
<groupId>org.springframework.boot</groupId>
<artifactId>spring-boot-maven-plugin</artifactId>
</plugin>
</plugins>
</build>
</project>

主要是这两个地方。
然后是配置yml 文件:
spring:
  application:
    name: products

  cloud:
    nacos:
      discovery:
        server-addr: 192.168.3.7:8849

server:
  port: 9090
记得这里的地址是你之前部署nacos的服务器和暴露出的端口哦,8849别忘了
接下来我们新建一个controller,当然要有被调用的地方啦。
package com.example.springcloudalibabaproducts9090.controller;
import org.springframework.beans.factory.annotation.Value;
import org.springframework.web.bind.annotation.GetMapping;
import org.springframework.web.bind.annotation.PathVariable;
import org.springframework.web.bind.annotation.RestController;
@RestController
public class ProductController {
@Value("${server.port}")
private String port;
@GetMapping("/product/{id}")
public String products(@PathVariable("id") String id){
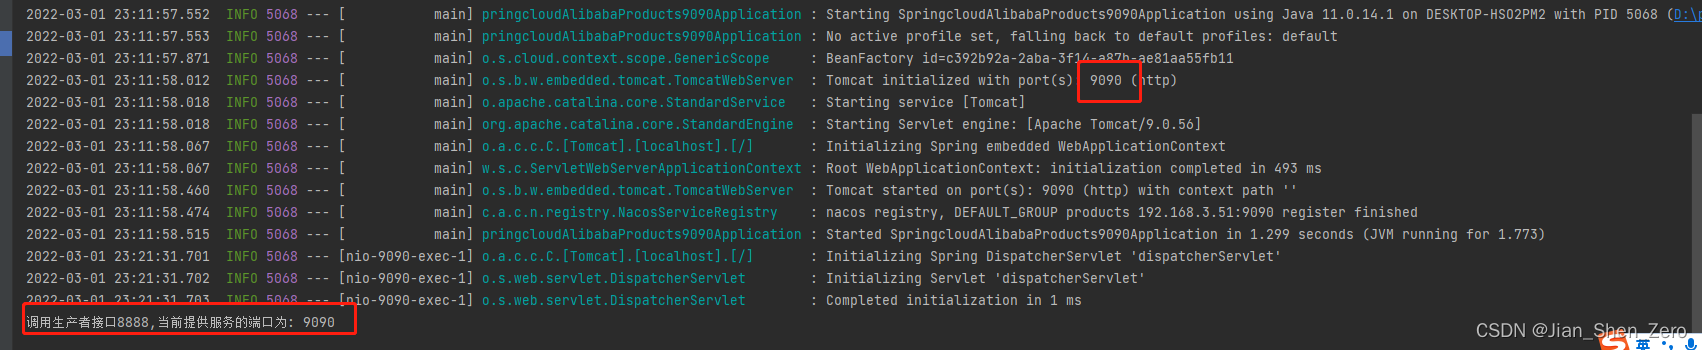
System.out.println("调用生产者接口" + id + ",当前提供服务的端口为: " + port);
return "调用生产者接口" + id + ",当前提供服务的端口为: " + port;
}
}
ok,运行一下
运行成功的话你就可以在你的nacos上看到这个了

完美。
这个服务名我猜测就是yml文件里的application.name了
接下来我们就到消费者了:
和生产者一样,建一个子模块:
新建的消费者的pom.xml如下
<?xml version="1.0" encoding="UTF-8"?>
<project xmlns="http://maven.apache.org/POM/4.0.0" xmlns:xsi="http://www.w3.org/2001/XMLSchema-instance"
         xsi:schemaLocation="http://maven.apache.org/POM/4.0.0 https://maven.apache.org/xsd/maven-4.0.0.xsd">
    <modelVersion>4.0.0</modelVersion>
    <parent>
        <groupId>com.example</groupId>
        <artifactId>cloudDemo</artifactId>
        <version>0.0.1-SNAPSHOT</version>
        <relativePath/> <!-- lookup parent from repository -->
    </parent>
    <groupId>com.example</groupId>
    <artifactId>springcloudAlibaba-users-9091</artifactId>
    <version>0.0.1-SNAPSHOT</version>
    <name>springcloudAlibaba-users-9091</name>
    <description>springcloudAlibaba-users-9091</description>
    <properties>
        <java.version>11</java.version>
    </properties>
    <dependencies>
        <dependency>
            <groupId>org.springframework.boot</groupId>
            <artifactId>spring-boot-starter-web</artifactId>
        </dependency>

        <dependency>
            <groupId>org.springframework.boot</groupId>
            <artifactId>spring-boot-starter-test</artifactId>
            <scope>test</scope>
        </dependency>

        <!--引入nacos client的依赖-->
        <dependency>
            <groupId>com.alibaba.cloud</groupId>
            <artifactId>spring-cloud-starter-alibaba-nacos-discovery</artifactId>
        </dependency>
        <!--导入openfeign-->
        <dependency>
            <groupId>org.springframework.cloud</groupId>
            <artifactId>spring-cloud-starter-openfeign</artifactId>
        </dependency>

        <dependency>
            <groupId>org.springframework.cloud</groupId>
            <artifactId>spring-cloud-loadbalancer</artifactId>
        </dependency>
    </dependencies>

    <build>
        <plugins>
            <plugin>
                <groupId>org.springframework.boot</groupId>
                <artifactId>spring-boot-maven-plugin</artifactId>
            </plugin>
        </plugins>
    </build>

</project>
和生产的区别就是多了一个这个


接下来还是配置yml文件:
spring:
  application:
    name: consumers

  cloud:
    nacos:
      discovery:
        server-addr: 192.168.3.7:8849

server:
  port: 9091
记得端口不能重复啊,生产者9090,消费者9091
消费者要在启动类里多个注解哦:@EnableFeignClients
package com.example.springcloudalibabausers9091;

import org.springframework.boot.SpringApplication;
import org.springframework.boot.autoconfigure.SpringBootApplication;
import org.springframework.cloud.openfeign.EnableFeignClients;

@SpringBootApplication
@EnableFeignClients
public class SpringcloudAlibabaUsers9091Application {

    public static void main(String[] args) {
        SpringApplication.run(SpringcloudAlibabaUsers9091Application.class, args);
    }

}
接下来我们要新建一个client接口 看清楚是接口不是类哦,用来和生产者对接:
package com.example.springcloudalibabausers9091.client;

import org.springframework.cloud.openfeign.FeignClient;
import org.springframework.web.bind.annotation.GetMapping;
import org.springframework.web.bind.annotation.PathVariable;
import org.springframework.web.bind.annotation.RequestMapping;

@FeignClient("products")
public interface ProductClient {

    @RequestMapping("/product/{id}")
    String products(@PathVariable("id") String id);
}
首先要加上 @FeignClient("products") 注解。然后方法要和生产者保持一致。
接下来就是controller了
package com.example.springcloudalibabausers9091.controller;

import com.example.springcloudalibabausers9091.client.ProductClient;
import org.springframework.beans.factory.annotation.Autowired;
import org.springframework.web.bind.annotation.GetMapping;
import org.springframework.web.bind.annotation.RestController;


@RestController
public class ConsumerController {

    @Autowired
    private ProductClient productClient;

    @GetMapping("/invoke")
    public String invoke(){
        String result = productClient.products("8888");
        System.out.println("消费者:" + result);
        return result;
    }
}
说到这里我想起来了我和大佬的版本可能不一样所以我这报错:No Feign Client for loadBalancing defined. Did you forget to include spring-cloud-starter-loadbalanc。怎么办呢??加上
<dependency>
	<groupId>org.springframework.cloud</groupId>
	<artifactId>spring-cloud-loadbalancer</artifactId>
</dependency>
就可以了,我上面也补上了。
将消费者和生产者都启动之后你就会发现你的Nacos有两个服务了

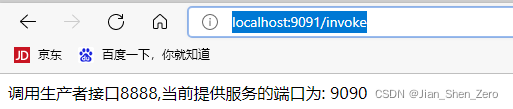
这个时候你调用消费者的消费接口:

完美,今天就到这了,明天继续学习继续写,
版权声明:本文为qq_34756209原创文章,遵循 CC 4.0 BY-SA 版权协议,转载请附上原文出处链接和本声明。