springboot-自定义starter
首先,关于自定义启动器命名问题:
官方命名示例:spring-boot-starter-web
第三方命名示例:mybatis-spring-boot-starter
所以我们自定义starter命名规则,可以借鉴mybatis。
即:自定义启动器名-spring-boot-starter
其次,思路问题:
1).我们可以写一个启动器只用来做依赖导入
【例如:dmsdbj-spring-boot-starter】
2).然后专门写一个自动配置模块。
【例如:dmsdbj-spring-boot-strater-autoconfigurer】
3).启动器依赖自动配置,调用者只需要引入启动器(starter)
开始编写代码
1).新建两个maven工程,然后如下图建立相关文件
【有些无用的文件我删除了,比如test文件夹】
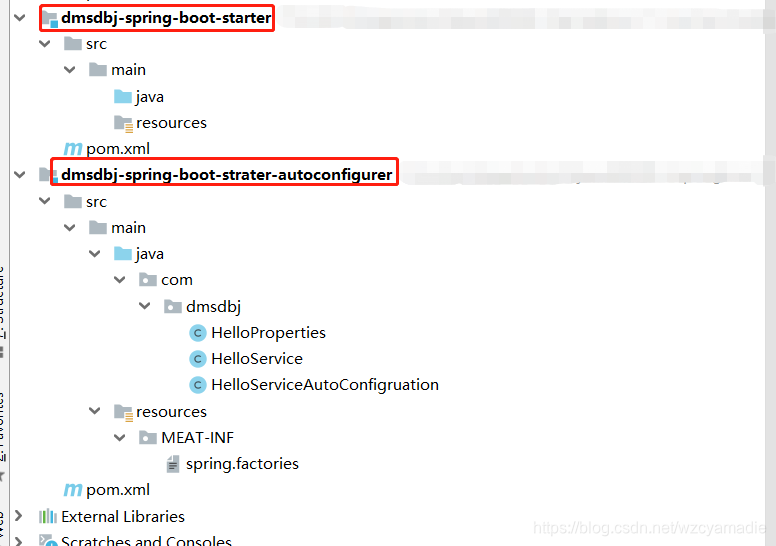
2).在启动器工程(dmsdbj-spring-boot-starter)的pom文件中,引入dmsdbj-spring-boot-strater-autoconfigurer工程的依赖。
    <!--启动器-->
    <dependencies>
      <!--引入自动配置模块-->
       <dependency>
          <groupId>com.dmsdbj</groupId>
          <artifactId>dmsdbj-spring-boot-strater-autoconfigurer</artifactId>
          <version>0.0.1-SNAPSHOT</version>
       </dependency>
    </dependencies>
3).在 dmsdbj-spring-boot-strater-autoconfigurer 工程中,引入相关依赖(根据自定义starter功能,导入相关依赖)。
4).编写dmsdbj-spring-boot-strater-autoconfigurer工程的业务逻辑功能。
我这里的功能:
自定义一个HelloService类,该类中有sayHello( String name )方法,根据传来的name字符串,然后给他拼接一个头字符串和尾字符串,最后返回回去。其中,头字符串和尾字符串均为可配置的,即:由调用方来设定值(从调用方的配置文件中读取。)
4.1,编写HelloProperties类
【该类作用:】
从发起调用者那里的配置文件,读取到头字符串和尾字符串的值,映射给该类中的对应字段。
package com.dmsdbj;

import org.springframework.boot.context.properties.ConfigurationProperties;

@ConfigurationProperties(prefix = "dmsdbj.hello")
public class HelloProperties {
   private String prefix;
   private String suffix;

   public String getPrefix() {
      return prefix;
   }

   public void setPrefix(String prefix) {
      this.prefix = prefix;
   }

   public String getSuffix() {
      return suffix;
   }

   public void setSuffix(String suffix) {
      this.suffix = suffix;
   }
}
4.2.编写HelloService类
【该类作用:】
根据HelloProperties类中读取的头字符串和尾字符串,和调用者类传来的name字符串,一起拼接成新的字符串,然后返回给调用者。
注意,到这一步,该HelloService类没有被注入到容器中呢还!!!
package com.dmsdbj;

public class HelloService {
   HelloProperties helloProperties;

   public HelloProperties getHelloProperties() {
      return helloProperties;
   }

   public void setHelloProperties(HelloProperties helloProperties) {
      this.helloProperties = helloProperties;
   }

   public String sayHello(String name) {
      return helloProperties.getPrefix() + "_" + name + "_" + helloProperties.getSuffix();
   }
}
4.3.编写HelloServiceAutoConfigruation类(自动配置类)。
【该类作用:】
激活 HelloProperties 属性文件,让该类生效。
为 HelloService 类注入 HelloProperties。
然后把 HelloService 注入到容器。这样调用者才能发现 HelloService 。
package com.dmsdbj;

import org.springframework.beans.factory.annotation.Autowired;
import org.springframework.boot.autoconfigure.condition.ConditionalOnWebApplication;
import org.springframework.boot.context.properties.EnableConfigurationProperties;
import org.springframework.context.annotation.Bean;
import org.springframework.context.annotation.Configuration;

@Configuration
@ConditionalOnWebApplication // 指明这是web应用,才会生效
@EnableConfigurationProperties(HelloProperties.class) // 让HelloProperties 属性文件生效
public class HelloServiceAutoConfigruation {

   @Autowired
   private HelloProperties helloProperties;

   @Bean
   public HelloService helloService() {
      HelloService helloService = new HelloService();
      helloService.setHelloProperties(helloProperties);
      return helloService;
   }
}
4.4.业务写完了,问题是,HelloServiceAutoConfigruation 类又如何被发现呢??HelloServiceAutoConfigruation如果不被发现,不被执行,后面逻辑都是无用功。所以,在resources目录下,新建 META-INF文件夹,然后新建spring.factories 文件。【注意,这里路径不能写错】
系统启动后就想要加载的那些自动配置类,必须配置在META-INF/spring.factories中
编写 spring.factories 文件。
org.springframework.boot.autoconfigure.EnableAutoConfiguration=\
com.dmsdbj.HelloServiceAutoConfigruation
大功告成,就差测试了。。。。
万事俱备,只欠东风???
不,还没测试呢啊。。。
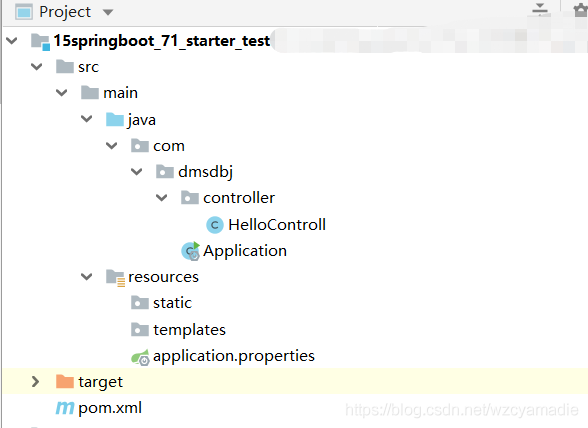
新建web工程,可以使用向导新建(快速)。如下目录结构:
1)。导入相关依赖,导入刚写的的starter启动器即可。
    <!--引入自定义starter-->
    <dependency>
            <groupId>com.dmsdbj</groupId>
            <artifactId>dmsdbj-spring-boot-starter</artifactId>
            <version>1.0-SNAPSHOT</version>
    </dependency>
有没有发现导入不进来??报红???-----因为上面的两个工程写完了没有install啊,所以本地仓库当然找不到了啊(私服,中央仓库更不可能有啊)
所以,去吧刚才那两工程install一下
【顺序的话,先dmsdbj-spring-boot-strater-autoconfigurer 后 dmsdbj-spring-boot-strater吧】
2)。编写头字符串和尾字符串的配置文件
在测试工程15springboot_71_starter_test中的resources下的application.properties文件中:
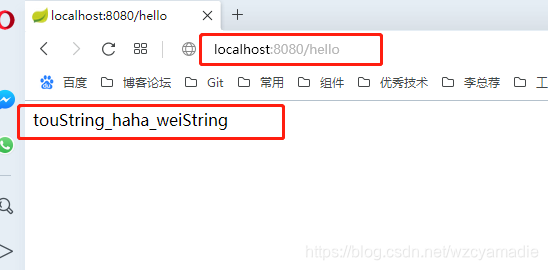
    dmsdbj.hello.prefix=touString
    dmsdbj.hello.suffix=weiString
3)。编写测试controller
package com.dmsdbj.controller;

import com.dmsdbj.HelloService;
import org.springframework.beans.factory.annotation.Autowired;
import org.springframework.web.bind.annotation.GetMapping;
import org.springframework.web.bind.annotation.RestController;

@RestController
public class HelloControll {

   @Autowired
   HelloService helloService;

   @GetMapping("/hello")
   public String hello() {
      return helloService.sayHello("haha");
   }
}
4)。开始测试,运行工程(测试工程的主程序类的main方法),然后打开浏览器输入“localhost:8080/hello”,回车,奇迹出现了。。。
到此,自定义starter结束,关于上面有什么疑问或者不妥,欢迎指出。