SpringBoot的RabbitMQ消息队列: 一、消息发送接收第一印象
本节用一个简单的例子,介绍SpringBoot中对RabbitMQ的使用。
一、创建工程
1、 在http://start.spring.io/中创建RabbitMQHello工程:
A、MAVEN工程
B、2.0.0.BUILD-SNAPSHOT
C 、Group:com.example
D、Artifact:RabbitMQHello
E、Packaging:jar
F、Java Version:1.8
G、勾选WEB、AMQP(Advanced Message Queuing Protocol via spring-rabbit)。
2、下载工程、解压,然后导入eclipse中
3、修改pom.xml以便于热部署
A、在dependencies中增加spring-boot-devtools
<dependency>
      <groupId>org.springframework.boot</groupId>
      <artifactId>spring-boot-devtools</artifactId>
      <optional>true</optional>
</dependency>
B、在build的spring-boot-maven-plugin中增加依赖包
	<build>
		<plugins>
			<plugin>
				<groupId>org.springframework.boot</groupId>
				<artifactId>spring-boot-maven-plugin</artifactId>
				<dependencies>
					<!-- spring热部署 -->
					<dependency>
						<groupId>org.springframework</groupId>
						<artifactId>springloaded</artifactId>
						<version>1.2.6.RELEASE</version>
					</dependency>
				</dependencies>
			</plugin>
		</plugins>
	</build>
4、增加日志配置文件
在src/main/resources下增加文件logback.xml,内容如下
<?xml version="1.0" encoding="UTF-8"?>
<configuration>
    <appender name="STDOUT" class="ch.qos.logback.core.ConsoleAppender">
        <encoder>
            <pattern>%d %p (%file:%line\)- %m%n</pattern>
            <charset>GBK</charset>
        </encoder>
    </appender>
    <appender name="baselog"
        class="ch.qos.logback.core.rolling.RollingFileAppender">
        <File>log/base.log</File>
        <rollingPolicy class="ch.qos.logback.core.rolling.TimeBasedRollingPolicy">
            <fileNamePattern>log/base.log.%d.%i</fileNamePattern>
            <timeBasedFileNamingAndTriggeringPolicy  class="ch.qos.logback.core.rolling.SizeAndTimeBasedFNATP">
                <maxFileSize>64 MB</maxFileSize>
            </timeBasedFileNamingAndTriggeringPolicy>
        </rollingPolicy>
        <encoder>
            <pattern>
                %d %p (%file:%line\)- %m%n
            </pattern>
            <charset>UTF-8</charset>
        </encoder>
    </appender>
    <root level="info">
        <appender-ref ref="STDOUT" />
    </root>
    <logger name="com.example" level="DEBUG">
        <appender-ref ref="baselog" />
    </logger>
</configuration>
配置文件把日志输出到控制台和文件。文件的字符集为UTF-8,控制台的为GBK(我用win10专业版)。
5、修改系统配置文件application.properties,编制RabbitMQ的链接参数
spring.application.name=rabbitmq-hello
spring.rabbitmq.host=localhost
spring.rabbitmq.port=5672
spring.rabbitmq.username=test
spring.rabbitmq.password=123456
RabbitMQ,我使用的是DOCKER托管的,参看
在docker的centos7上安裝rabbitmq3.6.5
rabbitmq的用户管理
二、编制RabbitMQ配置、发送、接受的代码
1、编写配置文件类
在com.example包中增加类,名称为HelloRabbitConfig,并修改代码为
package com.example;

import org.springframework.amqp.core.Queue;
import org.springframework.context.annotation.Bean;
import org.springframework.context.annotation.Configuration;

@Configuration
public class HelloRabbitConfig {

    @Bean
    public Queue helloQueue() {
        return new Queue("hello");
    }
}
2、编写发送消息类
在com.example包中增加类,名称为HelloSender,并修改代码为
package com.example;

import java.util.Date;

import org.slf4j.Logger;
import org.slf4j.LoggerFactory;
import org.springframework.amqp.core.AmqpTemplate;
import org.springframework.beans.factory.annotation.Autowired;
import org.springframework.stereotype.Component;

@Component
public class HelloSender {

    protected static Logger logger=LoggerFactory.getLogger(HelloSender.class);

    @Autowired
    private AmqpTemplate rabbitTemplate;

    public String send(String name) {
        String context = "hello "+name+" --" + new Date();
        logger.debug("HelloSender: " + context);
        this.rabbitTemplate.convertAndSend("hello", context);
        return context;
    }
}
3、编写接受消息类
在com.example包中增加类,名称为HelloReceiver,并修改代码为
package com.example;

import org.slf4j.Logger;
import org.slf4j.LoggerFactory;
import org.springframework.amqp.rabbit.annotation.RabbitHandler;
import org.springframework.amqp.rabbit.annotation.RabbitListener;
import org.springframework.stereotype.Component;

@Component
@RabbitListener(queues = "hello")
public class HelloReceiver {
	protected static Logger logger = LoggerFactory.getLogger(HelloReceiver.class);

	@RabbitHandler
	public void process(String hello) {
		logger.debug("HelloReceiver : " + hello);
	}
}
4、编写RestController,调用发送消息
在com.example包中增加类,名称为HelloController,并修改代码为
package com.example;

import org.slf4j.Logger;
import org.slf4j.LoggerFactory;
import org.springframework.beans.factory.annotation.Autowired;
import org.springframework.web.bind.annotation.PathVariable;
import org.springframework.web.bind.annotation.RequestMapping;
import org.springframework.web.bind.annotation.RestController;

@RestController
public class HelloController {
	protected static Logger logger=LoggerFactory.getLogger(HelloController.class);

	@Autowired
        private HelloSender helloSender;

	@RequestMapping("/send/{name}")
	public String helloworld(@PathVariable String name) {
		return helloSender.send(name);
	}
}
5、运行测试
A、启动docker中容器rabbitmq5672。docker start rabbitmq5672 (如果已启动,则忽略)
B、启动工程。在工程所在的文件夹打开命令行,且在命令行中执行 mvn spring-boot:run
C、在浏览器中输入 http://localhost:8080/send/上帝
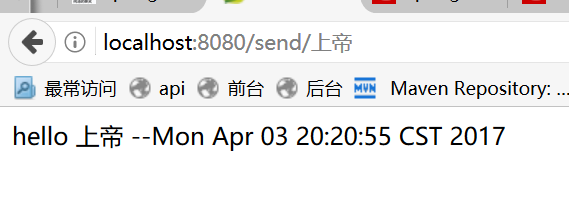
浏览器中显示

控制台中显示,成功发送、接收消息
三、小结
1、rabbitmq连接
1.1 springboot,在启动时,根据系统配置文件的参数建立一个rabbitmq连接。参看控制台日志:
(MBeanExporter.java:431)- Registering beans for JMX exposure on startup
(MBeanExporter.java:916)- Bean with name 'rabbitConnectionFactory' has been autodetected for JMX exposure
(MBeanExporter.java:678)- Located managed bean 'rabbitConnectionFactory': registering with JMX server as MBean [org.springframework.amqp.rabbit.connection:name=rabbitConnectionFactory,type=CachingConnectionFactory]
(DefaultLifecycleProcessor.java:343)- Starting beans in phase -2147482648
(DefaultLifecycleProcessor.java:343)- Starting beans in phase 2147483647
(AbstractConnectionFactory.java:347)- Created new connection: SimpleConnection@7075a8f1 [delegate=amqp://test@127.0.0.1:5672/, localPort= 62881]
1.2、在springboot启动之后,查看rabbitmq(http://localhost:15672/)的connections,也可以查看到。当然,你也可以停止springboot去看链接(停止之后,当然就没有链接了).
1.3、把logbak.xml的root的等级修改为debug,你会发现监听在不断的链接reabitmq;它就是一个心跳。通过这个心跳,rabbitmq也知道存在哪些监听器在监听那个队列。
2、配置文件
在配置文件中,仅仅配置了一个名为hello的队列。以后发送、接收都与这个队列相关。
3、发送消息
3.1、发送消息使用模板机制,用springboot自动注入的rabbitTemplate,它已经封装好链接、管道、转换等。
3.2、消息转换和发送
void convertAndSend(String routingKey, Object message) throws AmqpException;
它的注释是:Convert a Java object to an Amqp {@link Message} and send it to a default exchange with a specific routing key.
转换一个Java对象为Amqp消息,然后再用缺省的交换机指定路由键发送消息。
4、接受消息
4.1、监听消息
在类上声明@RabbitListener(queues = "hello"),表示监听hello队列
4.2、消息处理句柄
在接收处理消息的方法上声明@RabbitHandler
Annotation that marks a method to be the target of a Rabbit message listener within a class that is annotated with {@link RabbitListener}.
5、印象
整个工程比较简单,没有什么特殊的配置,仅仅三个类文件即可实现消息的发送和接受。