使用USB网络摄像头和ROS跟踪ArUco Markers
前言
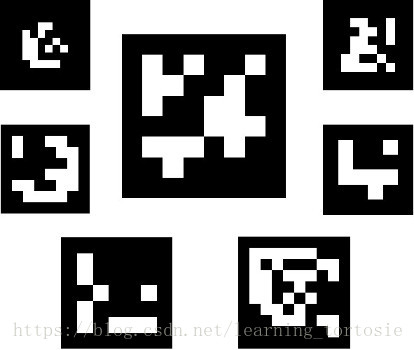
在实际应用中,在环境中部署下图所示的Markers,可以辅助机器人进行定位,弥补单一传感器的缺陷,纠正误差等。
相关资料
- ArUco library
- OpenCV中的aruco module,中文翻译
- http://sauravag.com/2015/03/how-to-tracking-aruco-marker-using-a-usb-webcam-and-ro/
- https://github.com/pal-robotics/aruco_ros
- https://blog.csdn.net/qq_38288618/article/details/78174577?locationNum=8&fps=1
安装与运行
1.安装aruco_ros
mkdir -p ~/aurco_catkin_ws/src
cd ~/aurco_catkin_ws/src
git clone https://github.com/pal-robotics/aruco_ros.git
cd ..
catkin_make install
sudo apt-get install ros-indigo-usb-cam  #安装USB摄像头的ROS驱动,如果已经安装,可跳过
source install/setup.bash
gedit src/aruco_ros/aruco_ros/launch/single.launch
修改single.launch文件,将图像和相机信息重新映射到usb_cam节点发布的主题:
<remap from=”/camera_info” to=”/usb_cam/camera_info” />
<remap from=”/image” to=”/usb_cam/image_raw” />
2.依次打开4个终端
(1)启动ROS
roscore
(2)启动相机
roslaunch usb_cam-stream.launch
(3)检测Marker
cd ~/catkin_ws/src/aruco_ros/aruco_ros/launch/
roslaunch single.launch
(4)启动窗口,可视化检测结果
rosrun image_view image_view image:=/aruco_single/result
到这里,可以检测到Marker,并识别出其ID,但是要想得到pose,还需要使用ROS的标定工具对USB摄像头进行标定,获取其相机内参和畸变系数,标定完成后文件会默认保存在~/.ros/camera_info/head_camera.yaml。如果没有进行标定,在启动摄像头时也会提示~/.ros/camera_info/head_camera.yaml不存在。
我的head_camera.yaml:
image_width: 640
image_height: 480
camera_name: head_camera
camera_matrix:
rows: 3
cols: 3
data: [715.4773327272667, 0, 350.1774419385586, 0, 714.726332331103, 267.833062747371, 0, 0, 1]
distortion_model: plumb_bob
distortion_coefficients:
rows: 1
cols: 5
data: [0.02384819558244758, -0.3101676611115829, 0.002988493020889629, 0.006854673868651895, 0]
rectification_matrix:
rows: 3
cols: 3
data: [1, 0, 0, 0, 1, 0, 0, 0, 1]
projection_matrix:
rows: 3
cols: 4
data: [707.2898559570312, 0, 354.6659889406728, 0, 0, 713.671875, 268.9584187581204, 0, 0, 0, 1, 0]
查看效果
查看位姿
rostopic echo /aruco_single/pose
以下为一次输出结果:
header:
seq: 4711
stamp:
secs: 1539847947
nsecs: 58810749
frame_id: stereo_gazebo_left_camera_optical_frame
pose:
position:
x: 0.0115116648376
y: -0.0146708637476
z: 0.124073162675
orientation:
x: -0.484284689864
y: 0.522697337469
z: -0.478991615536
w: 0.512662525266
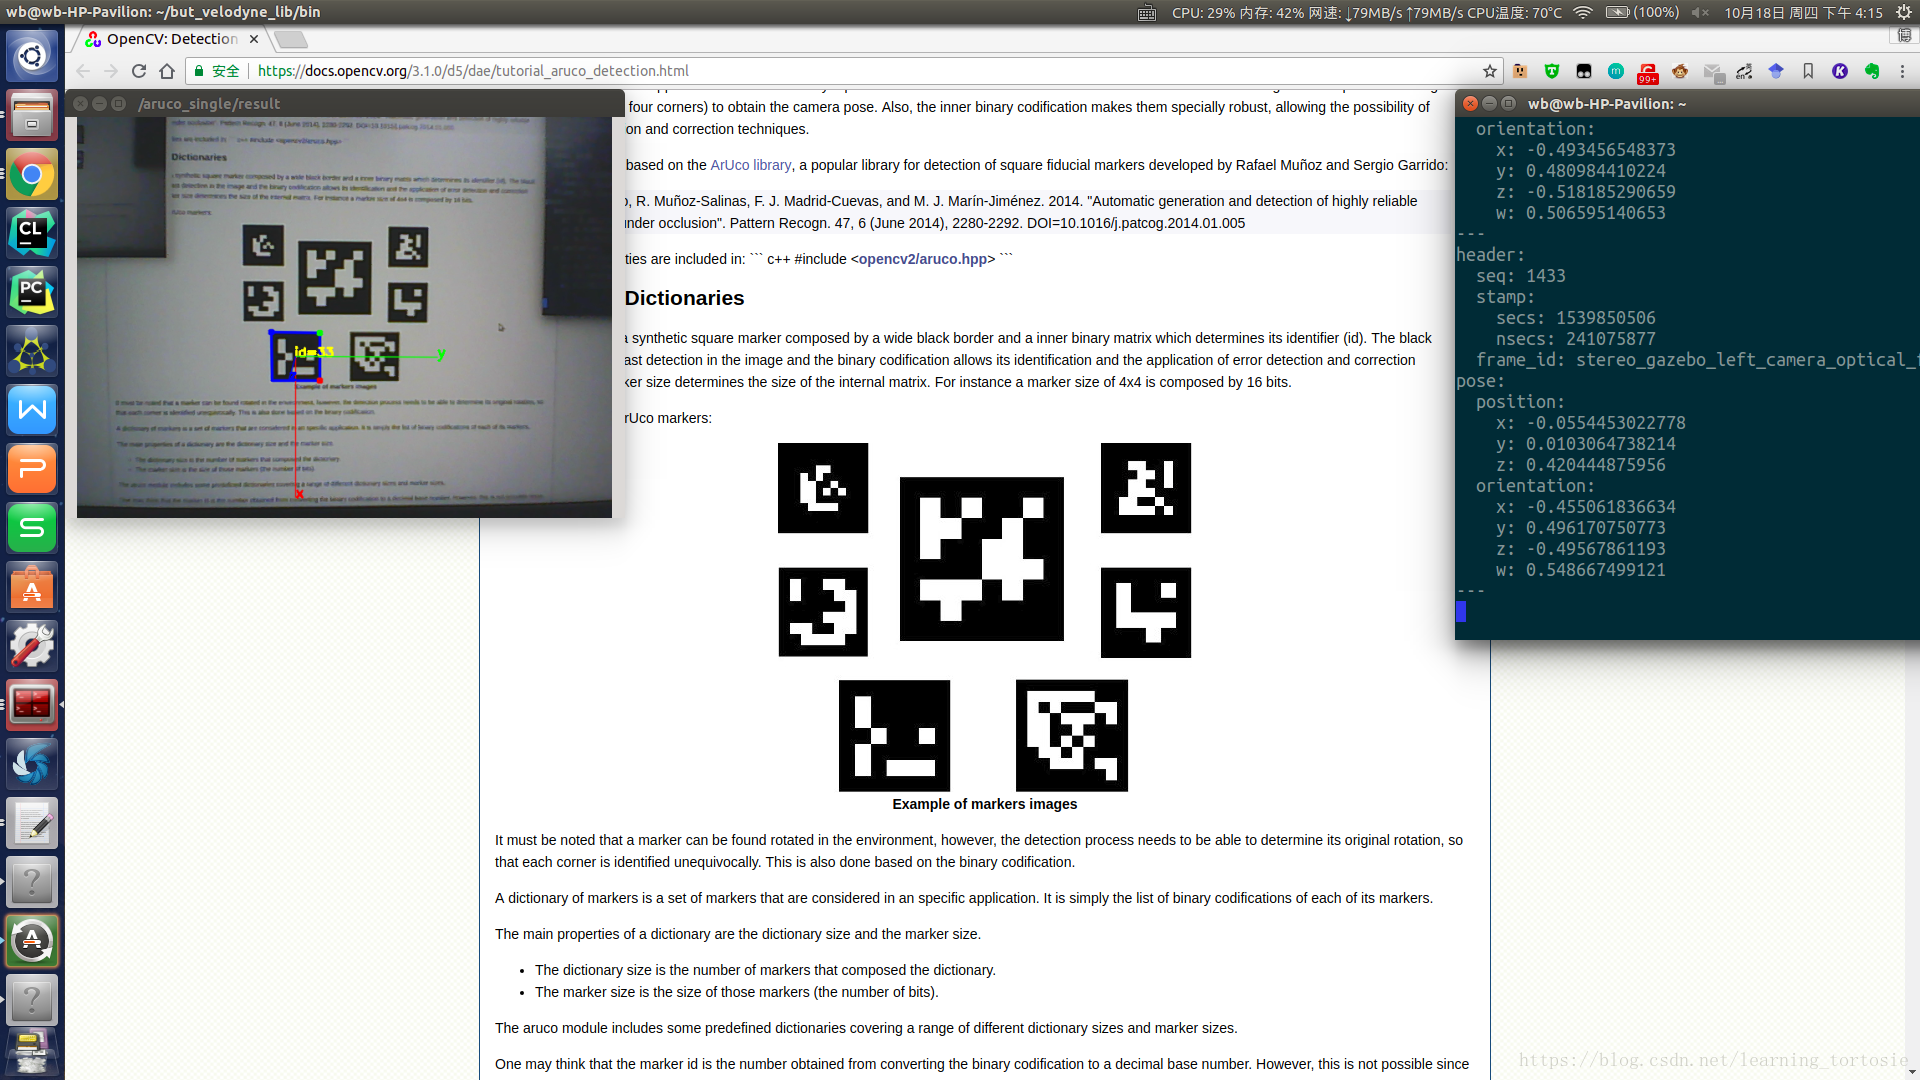
效果图
其中,左上角的窗口/aruco_single/result显示了检测到了ID为33的Marker,并且以Marker中心为原点画出了xyz坐标系,右上角的窗口/aruco_single/pose显示了相机的位姿,包括三维空间中的坐标和以四元数表示的姿态。
疑惑
这里只检测到了一个Marker。
猜测
因为我们启动的single.launch只包含一个Marker的信息,其同级目录下还有double.launch,所以我猜测还要根据实际需求,自定义Marker的数量和尺寸等信息。
总结
到这里,只是跑通了一个Demo,如果想实际应用,还要看文档和代码,进行深入的理解和必要的修改。